Showing posts with label toys. Show all posts

Monday, May 21, 2012

Two More Reveals {The Door is Done}

In all fairness, a lot really has been going on around the bungalow. Sometimes I get down on myself for not being as productive as I think I should be. Then, I remind myself that I'm a working, single parent who happens to also blog and run an Etsy shop. That's a pretty full plate.

After I process all of that, I sit back, put my feet up and remind myself that it's okay that every one of my projects takes double the anticipated time. It's also okay to post unstaged and imperfect pictures from time to time...


One of my most recent projects was a new storm door. You probably remember the original door post where I mention my little cleaning mishap. Anyway, it's been replaced {thanks to my dad}!

First, the broken door had to come down.


Say "hi" to my parents and Preston. It was a family affair that day!


Next, the old door had to go out to the curb. {Someone actually came and took it in the night.}


Then, we were left with a giant hole in the house. This part was a little nerve wracking!


Dad, was then able to jump into the real work!


Hours later {HOURS}, we had a beautiful new storm door installed! This took some figuring out though, and my typically handy dad seemed to struggle a bit. Let's just say that it was a process... 


Let's take a look back at what it looked like before.


Much better! Yes?

Next, was a necessary change for Preston's room. We don't have central air, and my little guy is very warm blooded, so I decided to get him a ceiling fan before summer really sets in. He started with a dreaded "boob light". {It was here when we bought the house.}


Please, ignore the poor picture quality. I'm still relying on my cell phone for all my photo capturing.


Anyway, I decided to go with the same ceiling fan I already have in my bedroom, and I did that for a few reasons.

First of all, I like the simple style of it. I also love the power it gives out and the overall quality of the fan. Our ceilings are pretty tall, and this fan comes with a handy remote that includes a light dimmer too. Basically, it's the perfect fan, in my bronze finish, for a modest budget. You can't go wrong with that. It's also a special order product from Lowe's, and since I work there now, a discount was taken off this time around. Score!


.
Disregard the giant toy mess. I've recently taken care of it with a new toy storage option. A post on that will come later.

I'll leave you tonight with one of my most recent favorite shots of Preston. He just came home from nine days away in Florida with my parents visiting my brother and his family. I didn't get to go, because I had to work {insert sad face}.

This was taken on the beach near Palm City. Isn't he precious?!


Crystal xoxo

Thursday, March 8, 2012

Preston's Toddler Room: As Easy as 1, 2, 3

You might remember this original post showcasing Preston's 3-in-1 easel. I have had so much fun watching him explore his artistic ability and strengthen his fine motor skills with his easel, and it's EASILY my favorite DIY project to date! I mean what's not to love?!

My only issue was finding some way to store his supplies in a handy cute way.

I racked my brain for creative solutions. Then I had an idea. I was going to keep it simple, but I needed three pails. The hunt began, and I looked and relooked everywhere. Nothing was right, or they didn't have enough on hand. I was getting frustrated!

Last week, I finally found the perfect shade of red pails at Hobby Lobby {$1.19/each}, and they had enough! 


Little bronze hooks were easy enough to find, but I actually got them in sets of two at Kmart for around $2.50/set. The finishing touches were the little wooden numbers I've been hanging onto forever.


I can't remember where I actually bought them, but I do remember that they were $.50/each on clearance! I happened to have the perfect shade of blue paint on hand, so I just painted them and hot glued them in place. Some might say they're a little large for the pails, but they don't bother me...


Gosh! Isn't it c-ute?!


And Preston seems to love the easy access. He pulled his stool up to it right away and got to work. Why didn't I think of that?!


Oooohhh! I'm so in love with this entire project, and it really was super easy to do!


This post has been linked to:

Addicted 2 Decorating

Saturday, December 3, 2011

Preston's Toddler Room {DIY Activity Easel}


I've been at it again. Preston has a NEW activity easel, and we both think it's pretty fantastic!

First, we have to give credit where credit is due, because I have to be completely honest. I didn't come up with the main idea myself.


I first came across this picture on Pinterest, and I immediately knew I had to make one. You can read about the original "Alphabet Board" from Nic and Kate here.

While the original is fantastic, I just HAD to make a few additions and modifications. I started with a $10 oil drip pan from Walmart and spray painted it with chalkboard paint {three coats for extra durability}. It took two cans of spray paint total.


Next, I used 3M Command Medium Picture Hanging Strips {9 strips total} and hung it in place per package instructions. I had to play with it a few times to get it level, but it was relatively easy. My level did fall off in the process and took a small chunk of paint with it. I just touched it up with a black permanent marker though. Easy peasy! {Notice how the stamped words on the pan are almost unnoticeable once painted. The paper roll completely covers them now, since I hung the board with the letters at the top.}

A final trip to Lowe's did the trick. I purchased an ivory screw-in curtain tie back {$5.97} and a roll of floor protector paper from the paint department {$3.97}. Back at the bungalow, I screwed the tie back in place and hung the paper roll on a piece of jute twine.


The final step was to cure the chalkboard {per can instructions} and throw on the wooden alphabet magnets! For now, I hung a bucket of art supplies from a magnetic hook, but I have a few other ideas for easily accessible art supply storage. I just can't decide which direction to go, so we're going to live with it awhile first!


The total project cost was about $28, but that's still A LOT cheaper than any store bought easel!

P.S. You can score the little gnome vinyl decal from Etsy too.


By the way...

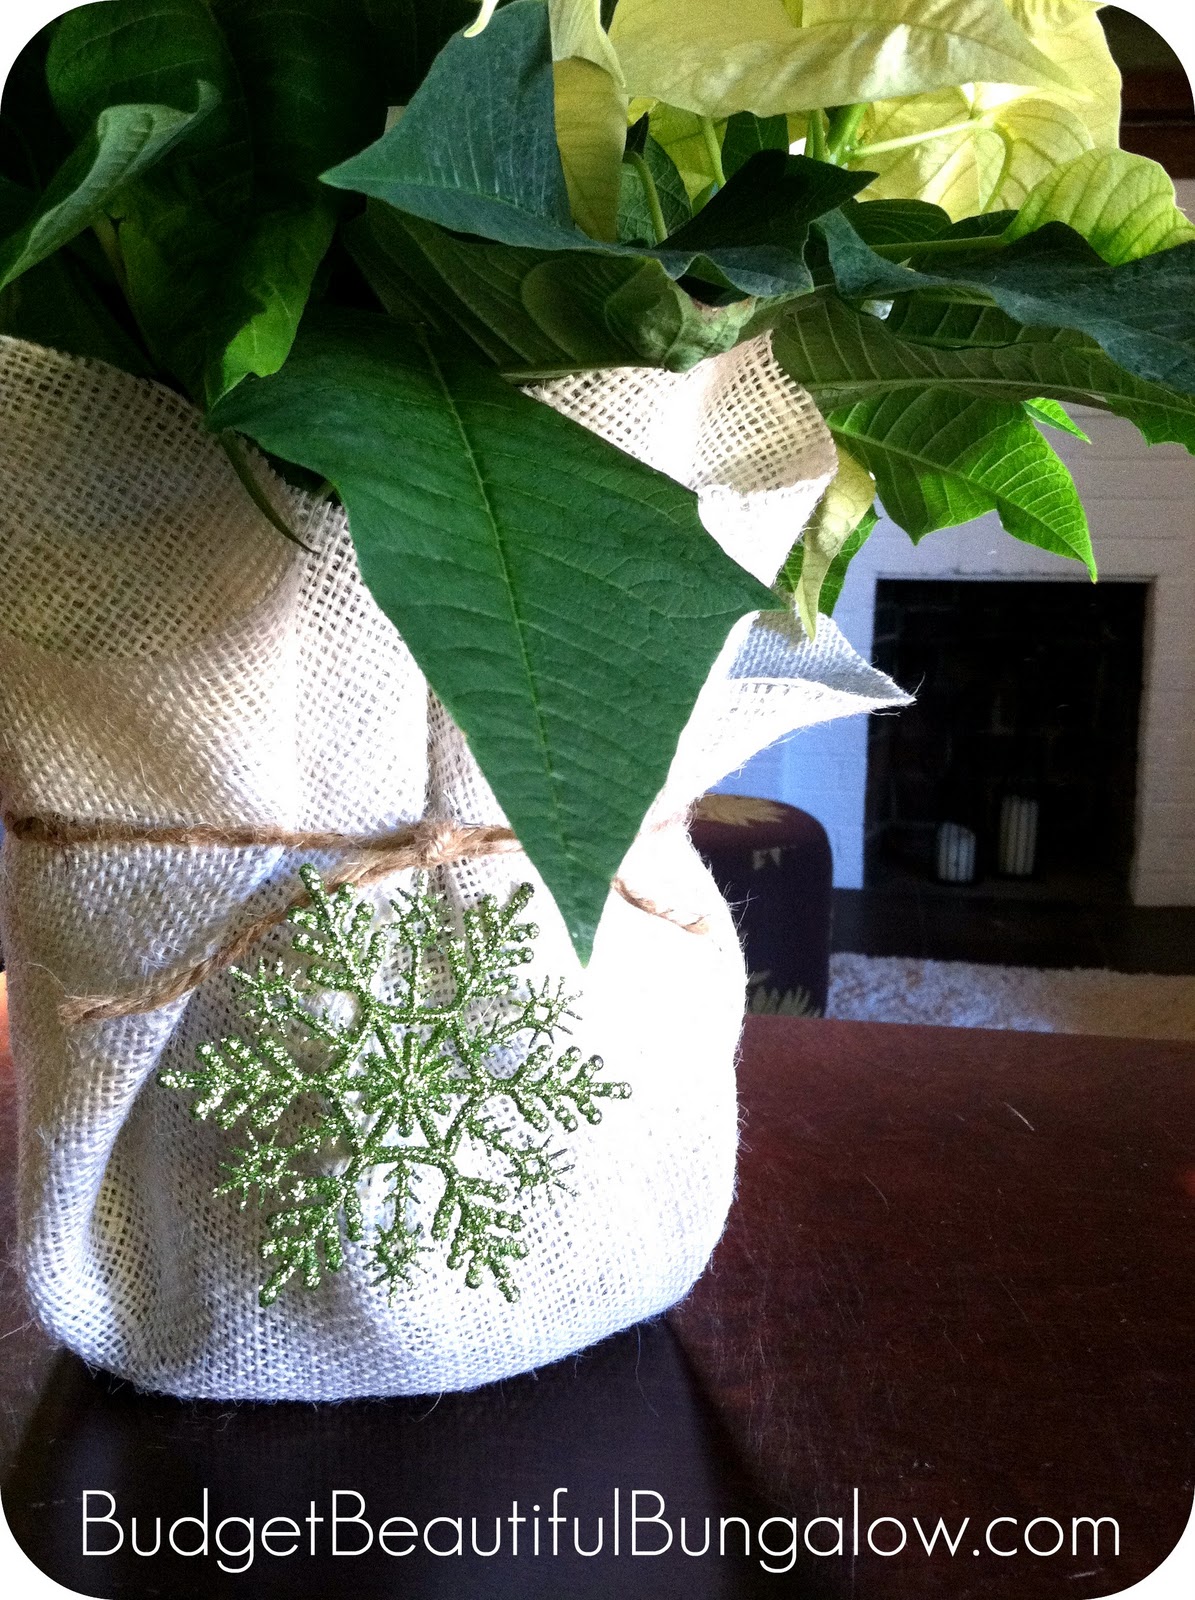
It's beginning to look a lot like Christmas!


{burlap covered poinsettia}

This post has been linked to...


Wednesday, October 5, 2011

Preston's Toddler Room {Dress-Up Corner}

I'm finally ready for another reveal of Preston's toddler room! If you haven't noticed already, I've been doing this in small segments, as time and money allows. If you have a small budget, and I mean small {like off brand mac and cheese small}, you probably have to redecorate in this fashion too, but that's alright! I think taking our time and making additions as we can, allows for a few things...

First of all, we can make an attack plan. This plan allows us to really think through our needs and prioritize. Maybe, we really don't need everything we want? This evolves over time approach can actually save us money {insert trumpets here}, and saving money is ALWAYS a good thing! We save money, because we might have enough time to brainstorm an even cheaper alternative to something we need. We might stumble upon a suitable replacement on sale, by the side of the road, at a yard sale, etc. The lesson here? Don't get down on yourself because your funds are well below the norm. Don't get down on yourself because your space seems to be taking forever to complete! Have faith that even Rome wasn't built in a day, so your home should evolve in much the same way. Be open to change, as your story unfolds! Who knows. The new story might be an even better one anyway, but don't get too far off track either. Revert back to the plan of attack and continue to cross things off your list as you can!

So...here we go! Preston's budget-friendly BOYS dress-up corner is complete! There are no tiaras or tutus in our house, but that doesn't mean Preston cannot benefit from the same lessons playing dress-up has for girls. Every child should be able to use their imagination and be anything they want to be-if only for a moment or two each day!


Notice that there is some empty space to the right of the mirror. That will be the home of his future play kitchen! As discussed before, plan ahead, and leave room for your child to grow. Adding as you can, also evokes excitement and draws out the fun for your child!

I think it's also important to add that we live in a small house. It's only two bedrooms, so we don't have space for a traditional playroom. Therefore, Preston's room must function well and hold ALL of his things. Careful planning has ensured that very little toys get scattered around the house, and this helps with my overall happiness and the clutter in the rest of our home! It also helps Preston learn where to put away is own toys. Everything has a place, and we don't buy anything unless we have an intended "home" for it.


This quote represents a lot to me. Not only is it appropriate for a dress-up area, but it's also a Seuss quote that compliments the vintage feel of the rest of the space. It was a custom Etsy purchase. I just measured the width of the mirror and had the seller make it to size. It was only $10, and you can purchase your own here.

I also think it's important to personalize any space in your home-especially a child's bedroom. That's why I chose to frame a print from Preston's 1 year photo shoot. He's dressed as a chef, and it's a perfect fit for this themed area of the room!


The white mirror was purchased at Walmart for around $12. I hung the mirror, and then I used scrap fabric, from Preston's DIY Wall Book Bin, made a bow and just taped the fabric to the back of the mirror. Next, I "hung" it over the sock monkey knob, to give it the appearance that it supports the mirror. The monkey knob was an Etsy find, but I don't think the seller is still in business...


These reproduction vintage flashcards are one of my favorite elements! For just $5.99, the impact they give is HUGE! I hung them in a playful way above the space to both define it and bring the feeling of the ceilings down. Our ceilings are high, and sometimes I like to give the impression of a cozier nook, especially for Preston {because of his height}. You can purchase your own set here at Pretty Little Studio.


After much debate, I decided to hang the cards with covered push pins. Also an Etsy find. You can purchase your own set here for $8.50. She even threw in a FREE one. Bonus!


Preston's dress-up clothes collection will surely grow with time. I just hung what he already had but left room for accumulation. The dog mask is another Etsy find. It was made by my friend Angela of Dani Jo Designs. Here's the listing for the dog mask, but she has different animals to choose from! Remember not to get carried away in the purchase of dress-up clothes. Take a walk around your house, to get started. You'd be surprised what you already have on hand {adult flannel shirts, aprons, scarves, hats, etc.}! It doesn't have to cost you a ton or be a big investment! Look at Dollar Stores and yard sales too...


Eventually, I'd like to get a crate for underneath the white hooks. I figure we can throw overflow in there-like shoes, scarves, more hats, etc, as needed!

I hope this has inspired you to create your own dress-up corner, nook or area in your home! E-mail me with any questions, needed suggestions or pictures of your completed space. I'd love to feature it here!

Other Supplies Seen:
White Clothes Hooks-$7.99 each at Lowes
Police and Construction Plastic Hats-$1 each from Target's Dollar Section
White 11x14 Frame-$12 Target
11x14 Print of "Preston the Chef"-$7.99 Shutterfly
"Preston the Chef" Taken by Little Tots Photography by Sarah Lawrence

This post has been linked here...Click the photo to join the FUN!


Sunday, September 25, 2011

Preston's Toddler Room {DIY Wall Book Bin}

I've been so excited to share this post with you, so I'm glad you found us today! As many of you know, I have been working hard transforming Preston's Nursery into a "Big Boy" room. He is 19 months old and still in his crib, but his play has really evolved in recent months. I could tell he was growing bored with his set-up {and maybe I was too}, but I also sensed he was ready for something more exciting and age appropriate. The rest of the BIG reveal is coming soon {I promise}, but for right now...come on in and sit awhile. His DIY wall book bin is complete!


In early March of 2010, I saw this picture online...


I immediately saved the photo to my computer and put it away in my memory bank of "some day" tasks. Preston was less than a month old, and I really wasn't gung-ho on any major projects. Since then, I've seen it pop around Pinterest, but I honestly have no idea who's original idea this is or where I saw it {Project Nursery's gallery most likely}. If it was you (1) Job well done! (2) Please, let me know so I can give you credit! Correction: A fabulous reader gave me the link to the original nursery post! This wonderful idea was MB's!

So...how did I make this adorable little room moment?! I'll have to explain, because I didn't take any tutorial-type shots. I'm sorry, but be reassured that it wasn't too tricky or {most important} too expensive!!!!

It all began when I was trying to hem the red and white gingham curtains from his bedroom. I ended up cutting the wrong end off, so I had a small piece with the rod pocket. The curtains were ruined, since it was my final panel, and it would look different from the other three...I was mad. I got *a little* upset. I pouted. Then, a light bulb came on, and I remembered this project. The scrap fabric piece would be perfect, because I'd only have to sew a rod pocket into one end {I knew the project required two pockets for hanging}.

I went to the space I wanted it to go and measured. Then, I measured the width of the material. Again, the decor gods were looking out for me, because it was a PERFECT fit! I did an extreme happy dance. Then, when I recovered, I got to work sewing.

I didn't follow any sewing rules with this job. I pretended like I knew what I was doing and went with it. First, I grabbed one of his larger books and laid the material out length wise in front of me. I folded it in half {to create the pocket you see on the wall} and laid the book inside to ensure it would have enough material to support it. It did, and I moved on {with building excitement}.

Because I had a finished, store bought curtain, the sides were already hemmed. I just had to create one rod pocket at the opposite end. I folded the material over and allowed for a two inch pocket. I sewed it across and was done.

If you have a raw piece of material, I recommend measuring your space to see how wide you need the finished book bin to be and allow for two inches of edge seams {one on each side of the finished book pocket}. Then, I would hem the right and left edges. Next, I would fold each of the opposite ends over, pin and sew a two inch rod pocket at each end. To simplify it, looking at your finished rectangle of material and going clock-wise, you should have a pocket at twelve o'clock, a finished hem at three o'clock, another pocket at six and a hem at nine. Maybe, that made it more confusing?! Darn it! I knew I should have taken pictures!!!!

Ok. After that, I went to Lowe's and bought two of these wall mounting brackets.


They are in the curtain hardware section, come in black or silver finishes and are less than $5 a piece. I believe they're called cafe rod brackets. I also bought two skinny white tension rods {for less than $2 each}. I believe she used a wooden dowel in the original, but I knew that required cutting, so I kept things simple and used these. At first, I noticed a little bowing, but it doesn't bother me, and they seem to be holding up well. They've been up for two weeks or so and get daily use too! The last part can be the tricky part, but I did it by myself. Well, I did have a tiny helper who held my screwdriver and played around...


I just measured the finished pocket, allowed for some tension rod space and screwed the first bracket in. Make sure you remember to decide where you want the mounted pocket to fall on the wall. We have wide baseboards, and I knew I didn't want the finished wall pocket to cover any of those! Also, I used a screwdriver, because I don't have my own drill yet {fingers crossed, Santa}, but I definitely think a drill would have been better!

Finally, I used my laser level and screwed the second bracket into place. I opened the tension rods to their needed length, tightened the first ends of the rods into the bracket, slide the pocket on, tightened the second ends of the tension rods into the bracket and stood back!

Of course, I couldn't leave it at that though! I HAD to add this adorable miniature bunting from Etsy, but it added whimsy and interest and was the exact finishing touch it needed! Blue Moon Studios was a JOY to work with and did a fantastic job on it too! It was well worth the $15 {and extra wait to post this}!


Preston seems pretty happy with it too...


Other products seen:
Personalized Red Gingham Soft Chair-Pottery Barn Kids
Sock Monkey-Target Stores
Personalized Sock Monkey Tattoo {pictured on it's arm}-Etsy
White Stool-Target Stores
Giant Red Crayon Bank-Toys are Us
Sock Monkey Toddler Pillow-Carousel Designs {babybedding.com}

This post has been linked to At The Picket Fence: Inspiration Friday. Click the photo to join the FUN!